|
 Raviolis
are a true Italian delight. The commercially packaged variations are passable
for the most part, and some name-brands are even quite good. However, they are
no match for the homemade variety. Raviolis require a great deal of work, of
course, but the end result is without compare. Raviolis
are a true Italian delight. The commercially packaged variations are passable
for the most part, and some name-brands are even quite good. However, they are
no match for the homemade variety. Raviolis require a great deal of work, of
course, but the end result is without compare.
My first experience with making raviolis from scratch was a literal marathon (nine hours from start to finish), and I did it entirely on my own. I was helped along with a few bottles of blush wine, so it's a wonder I remember anything about the process. I swore I'd never do it again.
That was about twenty years ago. Inevitably, I've since made raviolis once or twice a year. Each time I worked the pasta dough from scratch, and formed the ravioli using a manual ravioli cutter. The easiest part of the process was preparing the filling. On my first ravioli foray, I used ground beef and pork with minced onions, garlic and spices for the filling. In addition, clean-up will likely get a bit sticky after all the rolling and cutting. Forming dough leaves behind a concrete-like flour residue in every nook and cranny of your kitchen work space.
Nowadays, Ravioli Maker Plates, Ravioli Die Machines and the Kitchen Aid Ravioli Maker basically does the work of ravioli formation, but I still prefer making them the hard way. Somehow it seems more satisfying than churning out the little gems in conveyer-belt fashion.
Below is a more ordered description of the ravioli-making process, which has been refined over the years. Even though I only make ravioli once or twice a year, it is still quite an event in my house. You'll see what I mean as you read on.
Note: For the stand-alone Ravioli recipe, click here.
Article Contents:
The first thing I do before beginning the ravioli-making process is to define my work area. Once you get started - and as you near the end - your "work area" will become very important. The ideal setting is having as much space as possible, but if you don't have this luxury make do with what you have (as in the case when I made raviolis for the first time). Things can and will get very mucky if you don't clean as you go. Vast counter space is ideal, so it is advisable to clear off toasters, canisters or knickknacks to increase the work area. Clean surfaces are a must, and a cutting board or two won't hurt, either.
Below is a summary of ravioli filling ingredients, although they can vary depending on individual tastes. Some folks prefer cheese or vegetable stuffing with no meat, or chicken and seafood fillings, but the following recipe is what I always use.
A large sturdy frying pan (with a Teflon cooking surface if possible) will do nicely. Even a large cooking/soup pot will work. Select filling ingredients to your own taste, although the basic ingredients include fresh garlic, olive oil, onions, celery, carrots, parsley, salt and black pepper. Quantities depend on how much filling you want to prepare, and what your preferences are. I use a lot of freshly-minced garlic, and I always add a touch of Romano cheese to my stuffing mixture as it cooks. The choice of meat is also a personal choice, although I always use a combination of ground pork and beef. Substitutions can include chicken, or strictly cheese and vegetables.
Ravioli quantities depend on how much you want to make, and how many raviolis you want to end up with. The above recipe will make about 150 raviolis. However, this is not as much as it sounds considering eight raviolis is regarded as one serving. When you finish preparing the filling, it really does not look like much, either. But trust me, once you start stuffing the raviolis it will seem as if the filling is growing rather than disappearing.
To be honest, making the pasta dough and filling the ravioli to shape is the hardest part, and the most time-consuming. But it is well worth the trouble and struggle, because there is nothing like the taste of well-prepared hot homemade ravioli.
The basic ravioli dough ingredients are as follows:
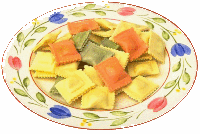
Ravioli can also be multi-colored by using dough ingredient variations such as spinach, squash and tomatoes. Adjustments may have to be made to the flour quantities when doing so.
Sift the flour into a large bowl, making a well in the center. Add the salt, oil, eggs and water. Mix the flour and the liquid together gradually with a wooden spoon, until all is absorbed. Place the dough on a floured board; knead until the mixture appears dry and smooth. Add more flour if the dough seems sticky. Cover with a tea towel and let stand for about fifteen minutes. Using a rolling pin, roll out the dough in handfuls at a time, until the flattened dough is very thin but not transparent. Cut dough into 4" circles.
In a large pot, bring water to a boil (enough to fill the pot 3/4 full). Add salt and olive oil to the water. When the water starts to boil, add the ravioli ten to twenty at a time. Boil gently for about ten minutes, or until the raviolis rise to the surface of the water. Drain carefully as not to rip open the ravioli skins.
If you only want to cook a small portion of the raviolis for consumption, freeze the uncooked portions in plastic freezer bags. I would recommend freezing sixteen ravioli per bag, which constitutes two servings. Layer the ravioli with wax paper to prevent sticking. Another method is to partially freeze the raviolis on cookie sheets before placing them into the freezer bags between wax paper layers. It is wise to layer the ravioli before freezing as they have a tendency to cling and tear when unthawed.
The possibilities and combinations are endless. Once you are comfortable with the whole process of making raviolis the hard way, trying different variations can become a very enjoyable task. You might not always have the time or inclination to make homemade raviolis but when you do, you will find yourself wondering (for the 100th time) why you don't do it more often.
(preparing ravioli using eggroll wrappers): If you'd rather not go through the homemade ravioli-making process or simply don't have the time, substitute the pasta with small eggroll skins. The following recipe (including a cream sauce) works quite well and is much simpler than the "from-scratch" variety of ravioli while retaining the "homemade" feel:
Heat olive oil in a large skillet over medium-high heat; add shallots. Cook and stir until shallots begin to brown. Reduce heat to medium; add chopped mushrooms and minced garlic. Continue to cook until liquid from the mushrooms has evaporated, about five to ten minutes. Remove skillet from heat; set aside to cool. In a medium bowl, combine the ricotta cheese and mushroom mixture; season to taste with salt and black pepper. Set aside. Arrange sixteen eggroll wrappers on waxed paper on a flat surface. In a small bowl, whisk together egg and milk. Brush egg wash onto eggroll wrappers. Place one tablespoon of filling mixture in the center of each wrapper; top with second eggroll wrapper. Press the edges together with fingers to seal or use the tines of a fork to seal. Bring a large cooking pot of lightly salted water to a boil; add ravioli one at a time. Cook until ravioli rise to the top of the water, about three to four minutes. Use a large slotted spoon to gently remove ravioli from water; place in a serving dish. Drizzle with favorite sauce, if desired. Serve. Note: The mushroom mixture can be made a day ahead if desired. Store in a covered container in the refrigerator until ready to combine with the ricotta cheese to complete the filling.
Cream Sauce for Mushroom Ravioli:
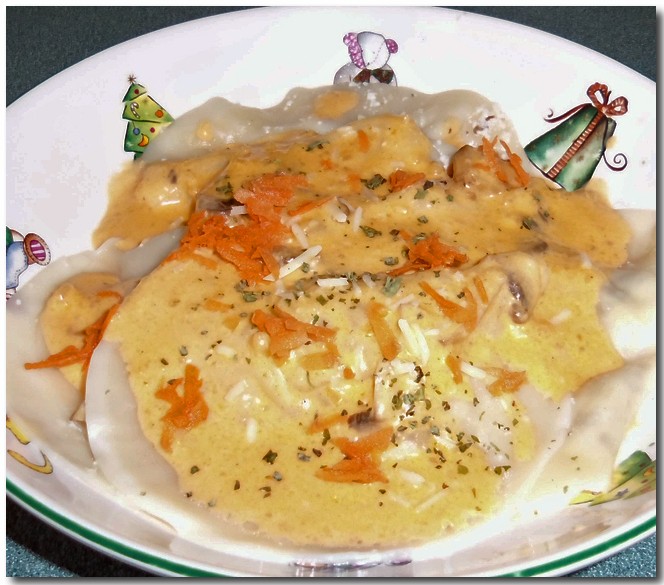
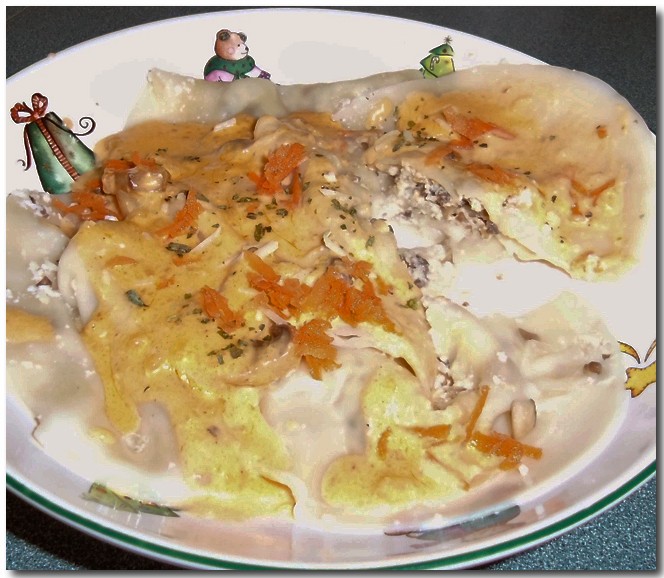
Warm olive oil in a large skillet over medium-heat; add minced garlic and cook for thirty seconds to one minute. Stir in chicken or vegetable stock; add the whipping cream and simmer for about one minute. Stir in tomato sauce and salt and black pepper to taste. Stir in sliced button mushrooms. If sauce appears too thin, use flour to thicken to desired consistency. Once sauce is heated through, toss with the cooked mushroom ravioli. Place the ravioli in a serving platter. Top with parmesan cheese; garnish with grated carrot and basil (optional). Serve.
Shenanchie's Note: The first time I made Mushroom Ravioli, I had a few tablespoons of filling left so I filled a few more eggroll wrappers and fried them in hot oil (see photo below). They almost turned out better than the boiled ravioli, and made for a great snack!
(Above): Leftover filling/eggroll wrappers fried in hot oil. Click on image to view larger size in a new window.
*Mushroom Ravioli images (C) Shenanchie O'Toole (2014). Click on images to view larger sizes in a new window.
Terms of Use: Reprinted exclusively for Food Fare
"Ravioli in the Kitchen" was written for entertainment purposes only and expresses the sole opinions of the author. This article is not meant to be a professional chef's essay on ravioli-making, but rather an observation about the generalities of the process from a home kitchen.
You are free to use the material in this article as reference, but if you happen to use direct wording from this piece, proper credit would be appreciated. Thank you.
To send Shenanchie a comment about this article, click here.
*Mushroom Ravioli images (C) Shenanchie O'Toole.
*Other ravioli images courtesy of Free Clipart and Fotosearch (stock photography & footage).
Please Note: "Ravioli in the Kitchen" also appears in the e-book Italian Cibaria, which is part of the exclusive Food Fare Culinary Collection.
|

 Make
sure the meat is ground fine; break it up more during the cooking process if
necessary. The vegetable ingredients (onions, celery and carrots) need to be
finely minced or grated. I start out with a large bowl, adding the meat, eggs,
breadcrumbs and spices. Mix well, and then spread
some of the olive oil in your cooking pan. Warm it up just a bit, and then add
the grated/minced vegetables. Let the vegetables cook for a few minutes, stirring, until
they become nearly tender. Then add the meat mixture, mixing in well with the
vegetables. Cook on low heat, stirring often, until the meat is fully cooked. Add the spinach and Romano cheese and mix in
well. Drain off any excess fat. Place meat mixture in a bowl; stir in the
ricotta cheese. Cover filling and set aside until ready to stuff the ravioli.
Make
sure the meat is ground fine; break it up more during the cooking process if
necessary. The vegetable ingredients (onions, celery and carrots) need to be
finely minced or grated. I start out with a large bowl, adding the meat, eggs,
breadcrumbs and spices. Mix well, and then spread
some of the olive oil in your cooking pan. Warm it up just a bit, and then add
the grated/minced vegetables. Let the vegetables cook for a few minutes, stirring, until
they become nearly tender. Then add the meat mixture, mixing in well with the
vegetables. Cook on low heat, stirring often, until the meat is fully cooked. Add the spinach and Romano cheese and mix in
well. Drain off any excess fat. Place meat mixture in a bowl; stir in the
ricotta cheese. Cover filling and set aside until ready to stuff the ravioli.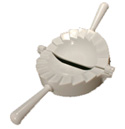 This
is where making the ravioli may become tricky, especially if you are using a
manual cutter (also known as Dumpling Makers). The manual cutters can be
purchased at any kitchenware department. They usually come with small
handles to fold over the filled dough. Place the dough circle (one at a time)
into the center of the ravioli cutter; place about a teaspoon of the meat
mixture in the middle. Carefully fold over the cutter so that edges are
pinched in and have formed a nice fanned look. The edges should hold together,
but if you are having trouble with this as I did the first time, take a little
cornstarch mixed with water and rub the edges gently. Repeat process with
remaining dough and filling. Lay completed ravioli on a large
cookie sheet while you finish. (Note: You may have meat mixture left
over, which is always a good addition for meat or tomato sauce).
This
is where making the ravioli may become tricky, especially if you are using a
manual cutter (also known as Dumpling Makers). The manual cutters can be
purchased at any kitchenware department. They usually come with small
handles to fold over the filled dough. Place the dough circle (one at a time)
into the center of the ravioli cutter; place about a teaspoon of the meat
mixture in the middle. Carefully fold over the cutter so that edges are
pinched in and have formed a nice fanned look. The edges should hold together,
but if you are having trouble with this as I did the first time, take a little
cornstarch mixed with water and rub the edges gently. Repeat process with
remaining dough and filling. Lay completed ravioli on a large
cookie sheet while you finish. (Note: You may have meat mixture left
over, which is always a good addition for meat or tomato sauce).